
Material needed
-
550 mm x 1520mm (60 inch) Heavy duty material e.g. Nylon or canvas - I used 1000 Denier, Waterproof, Cordura Nylon while this was very expensive when sourced in Australia I found a seller on Ebay who could ship it from the USA at about 1/3 the local cost.
-
550 mm x 1520 mm Padding - I used Felt 'Removalist blankets' available from my local hardware store
-
Thread.
Assembly
Cut a piece from the end of the Nylon (or other heavy duty material for the sake of simplicity I will refer to the material as nylon in these notes) so it is 550 mm by 355 mm this should leave a piece just over 1165 by 550 mm which will be used for the sides and will be referred to in these instructions as the 'Side piece'.
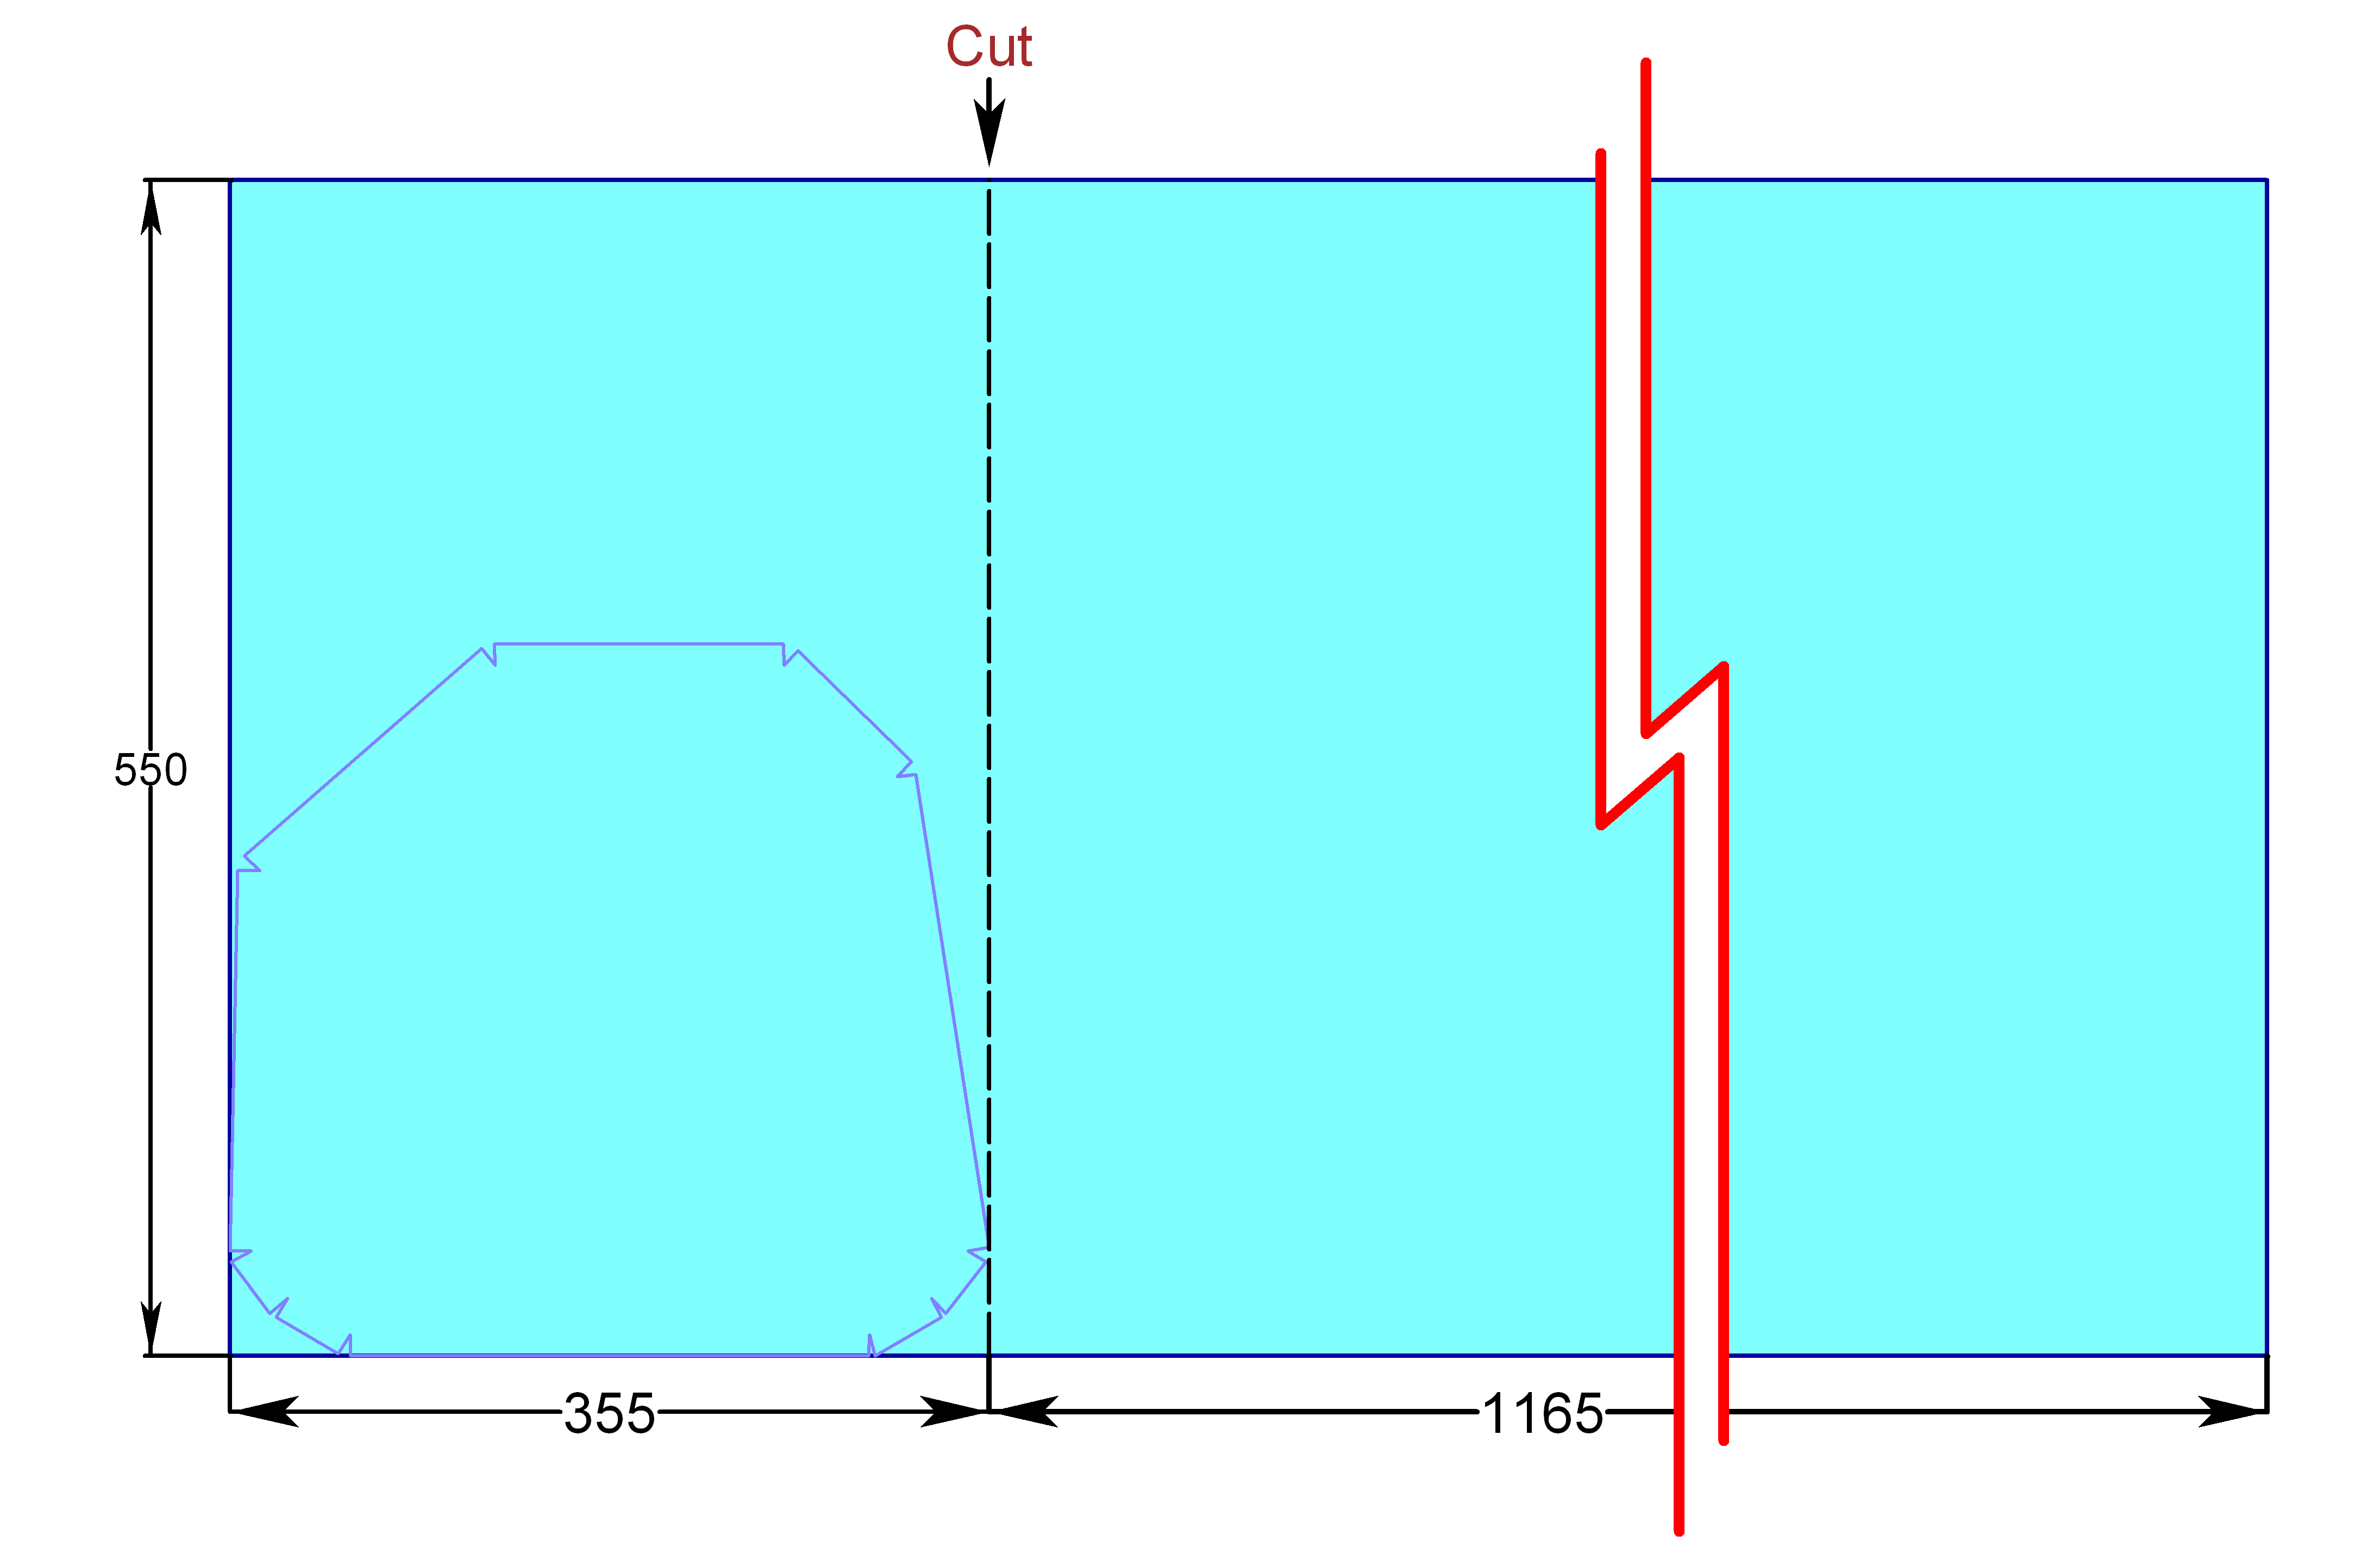
Next measure out the following on the 550 x 355mm piece of Heavy duty
material - this will become the top and will be referred to in these
instructions as the 'top piece'.
As there are rather a number of measurements and showing them all in one
diagram got rather messy bear with me if I show them over two diagrams.

Start with a 10mm 'margin' (shown in solid red) this is where I take all the other measurements from - 10mm allows enough room for a sewing 'tab' and provides known straight lines with a known right angle and as sections outside this margin are tabs used for sewing, accuracy is not as important here.
So please note that in accordance with this, all measurements shown on the diagram are taken from the margin.
While all measurements shown can be drawn out on a grid I have only shown a few Grid lines (red dotted lines) as otherwise the diagram would have become too busy.
Draw out the lines shown in black in the diagram above (I used navy blue Nylon so I drew the pattern using a yellow pencil) - note if you do not want a top handle then you do not need to bother with the following:

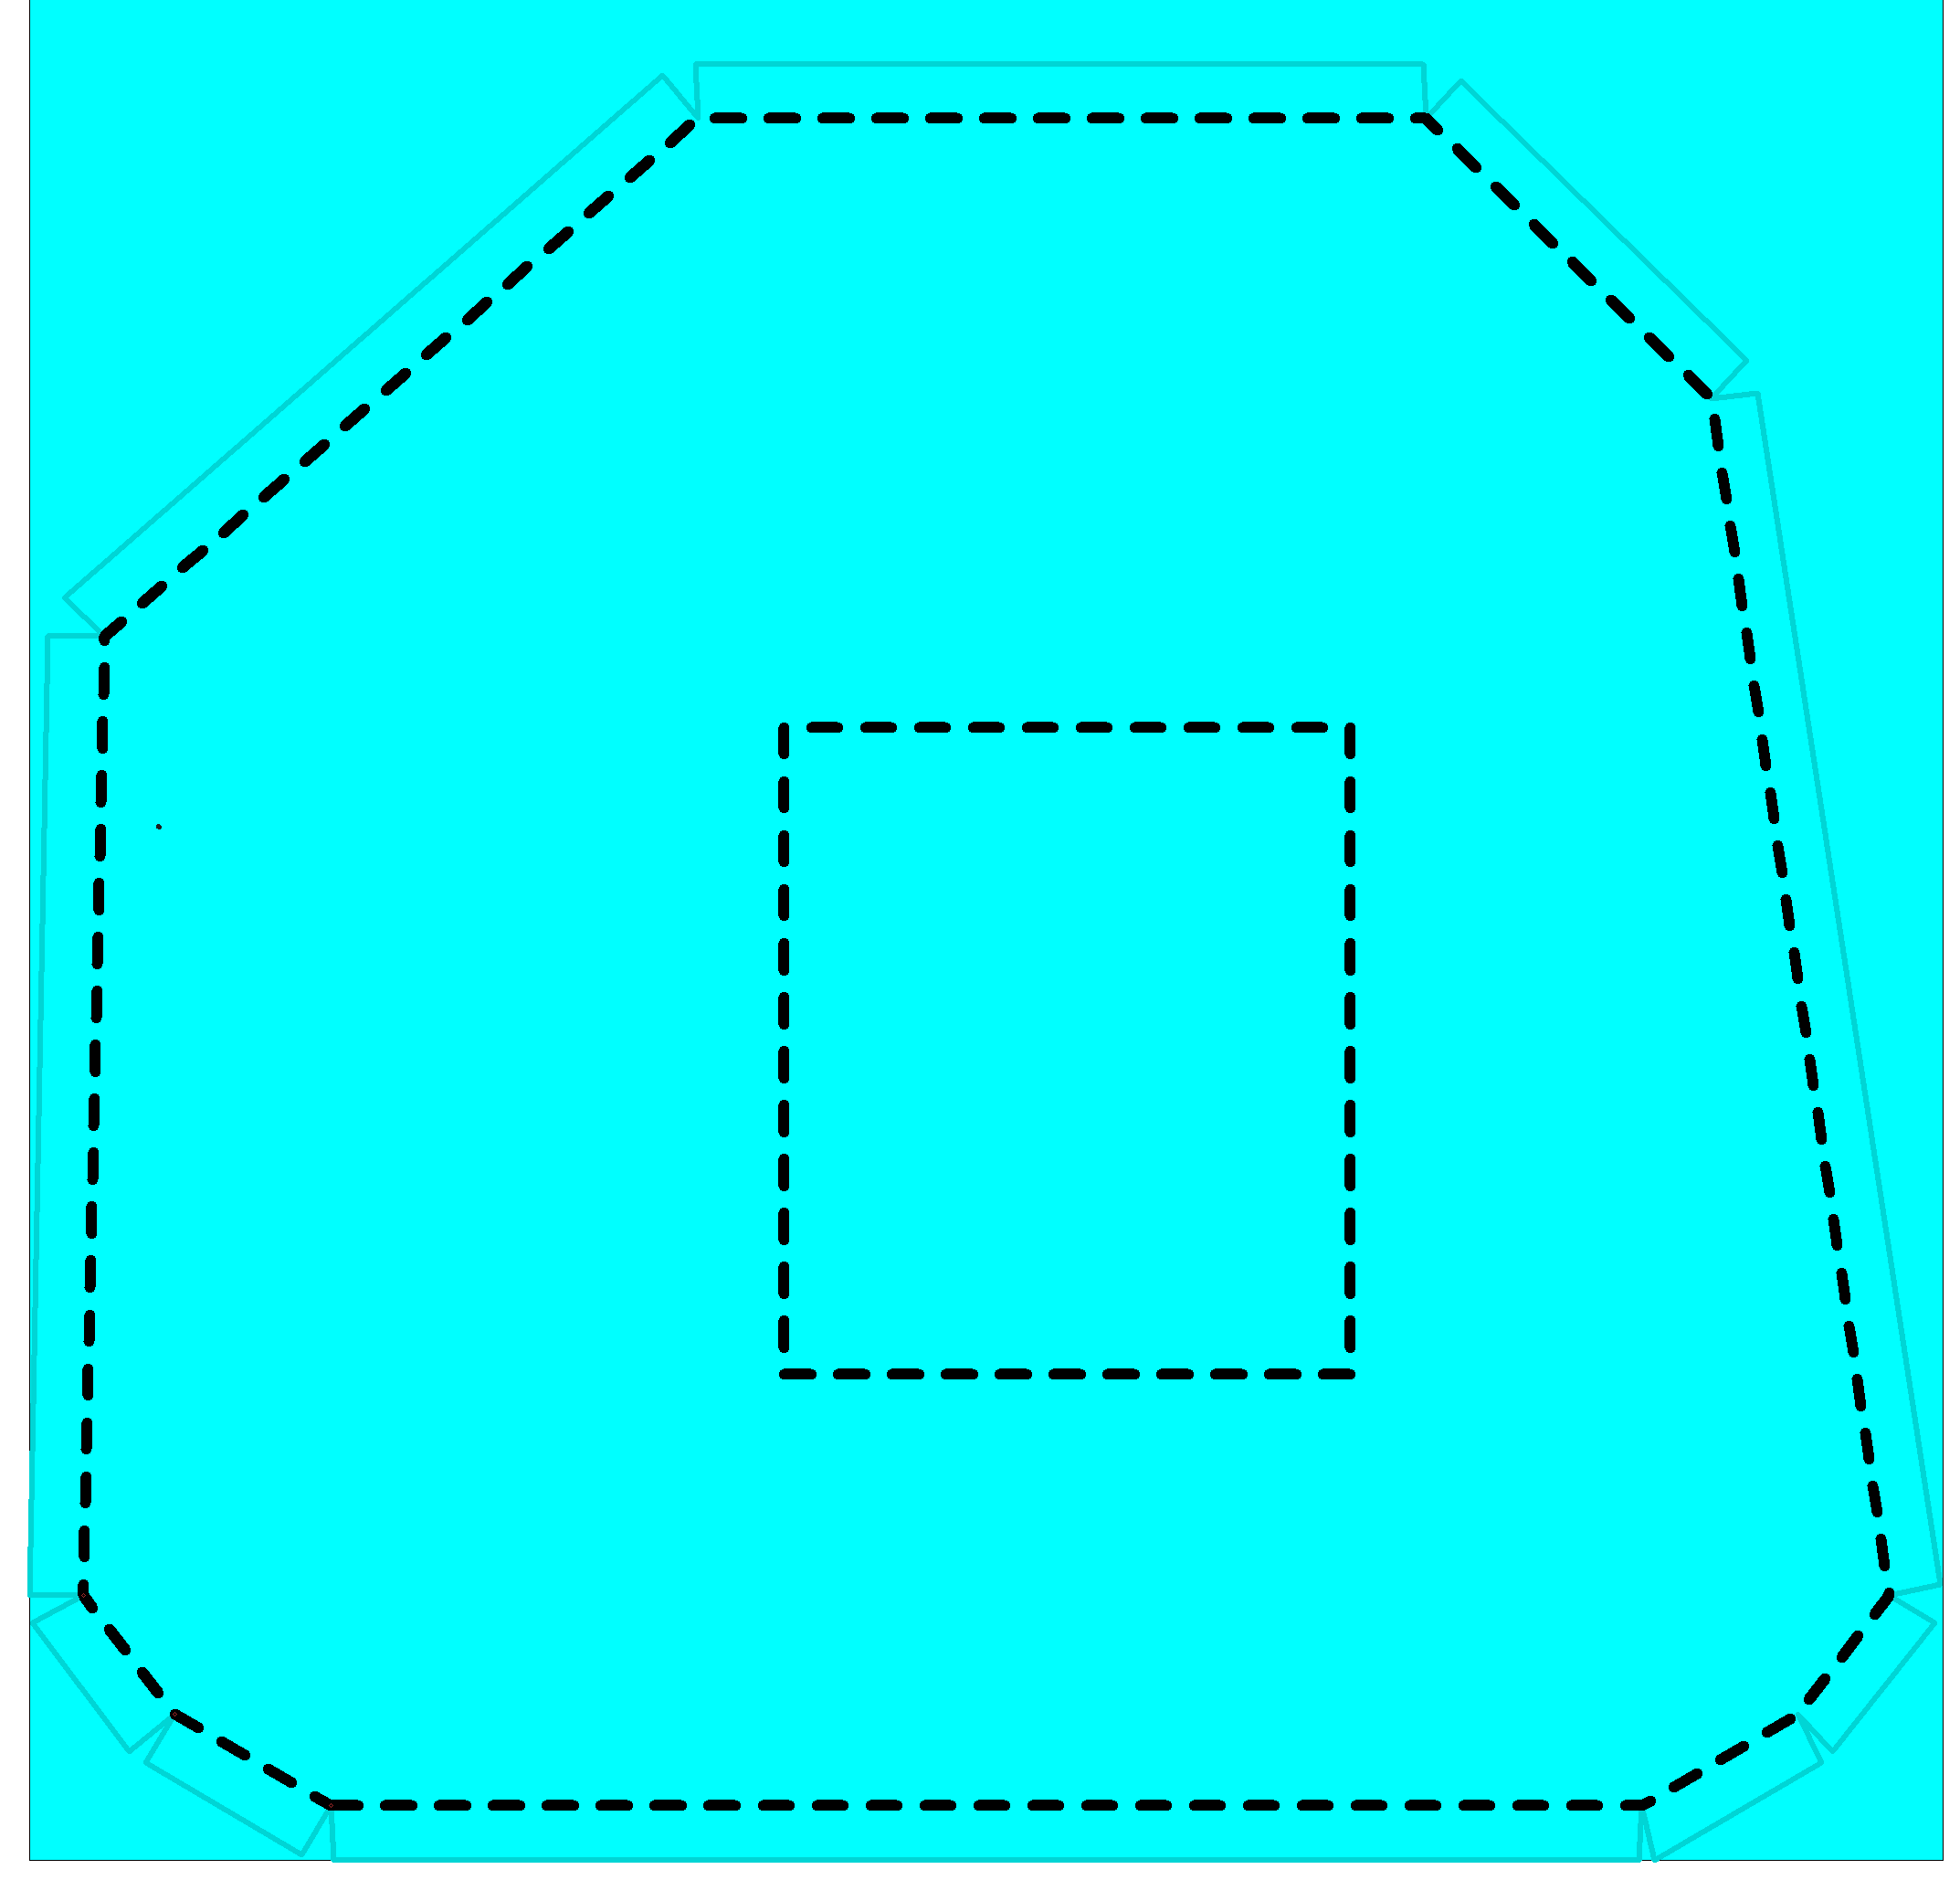
This stitching serves two purposes:
-
it keeps the material and felt together during assembly
-
the stitching is visible from the both sides providing a reference when the cover is being stitched together.
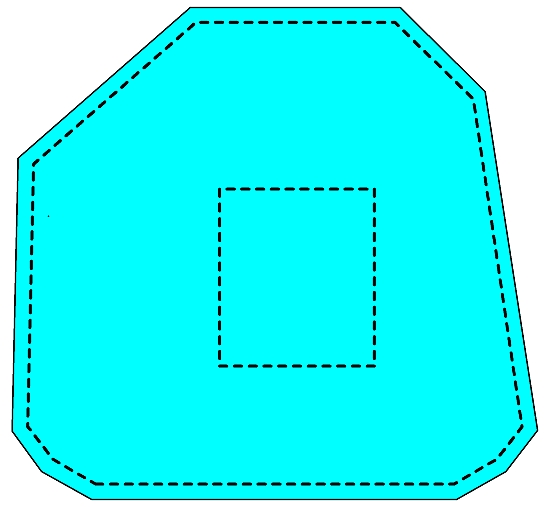
cut the material (and felt) about 1 centimetre
(or 0.4 inch) around the stitching (note do not cut out the handle yet) this
should give you a piece looking something like this:


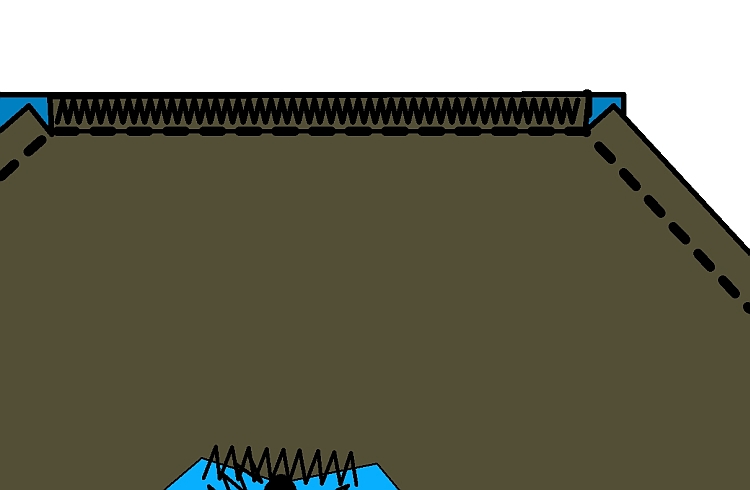
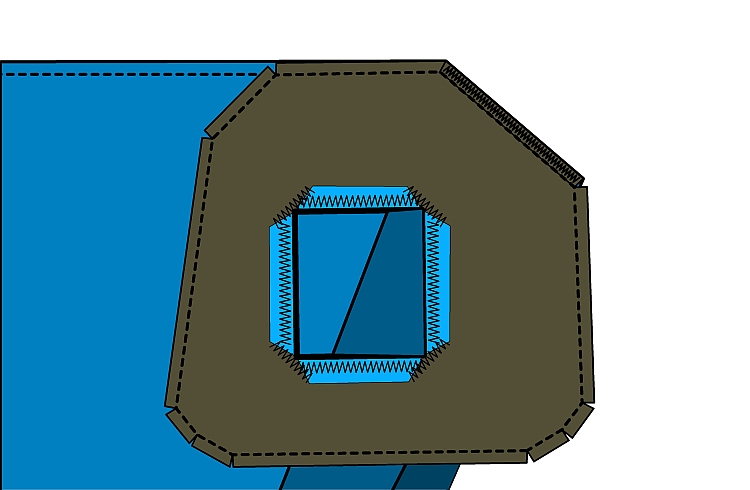
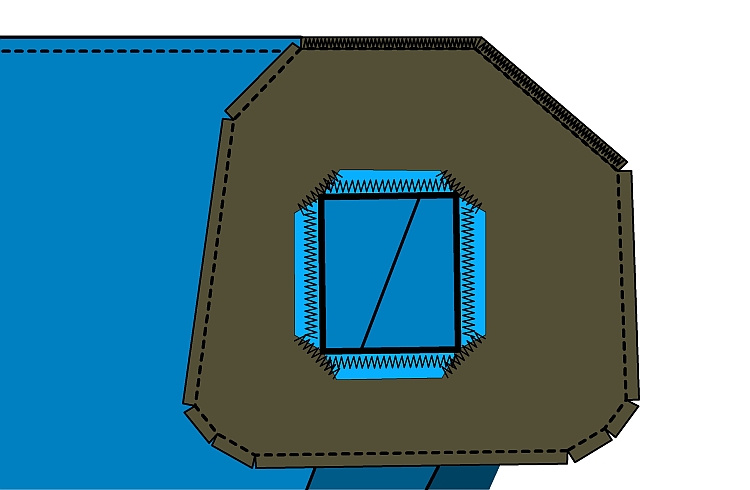
Fold these four tabs in and Sew them in place
using a zigzag stitch around the hole. Although the Rip stop Cordura I used is
pretty tough, it is still a good idea to provide extra reinforcement for the
corners by running an additional seam diagonally across each one:
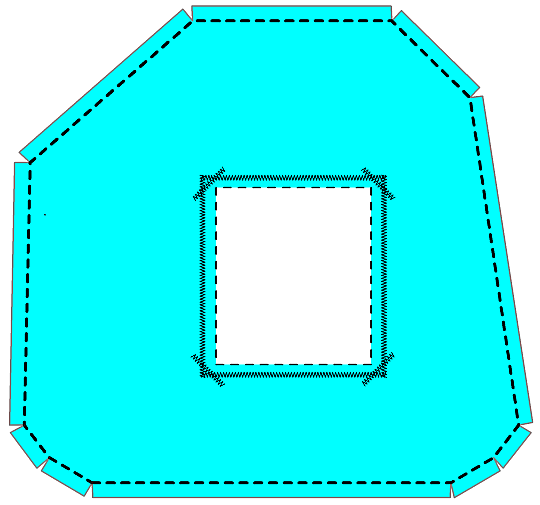

The next tip may be well known to sewing machine aficionados, but as a complete novice I was pleased to find that when I set the sewing machine to give me a tight zigzag stitch with one side of the zigzag off the edge of the hole the machine provided a nice, neat, reinforced seam (similar to around button holes) around the edge of the handle like this:


Take the side piece
and sew it to the felt by running a straight seam:
10mm from one edge, 10mm from the top and 15mm from the bottom
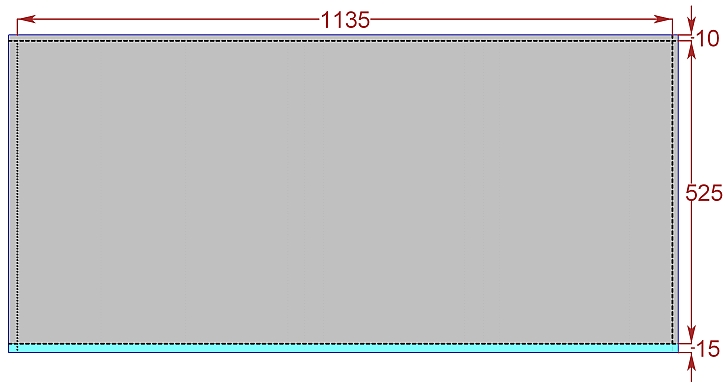
trim the felt along the seam 15mm from the
bottom (i.e. the light blue strip in the diagram above)

This will give a nice neat edge to the bottom of the cover.
You will note that the width of this material will be closer to 1165 rather than the measurement of 1135 in the diagram above - being a pessimist I chose not trim it to length until I had finished.
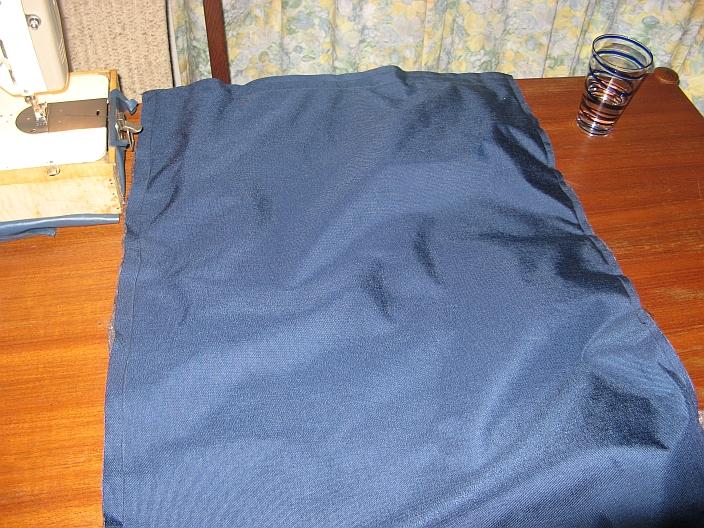
Next place this piece felt side down on a flat
surface and line up the other piece (felt side up) as shown in this picture:

note the Tab on the top piece aligns with the seam sewn down the right hand side of the Side piece NOT the edge of the Side piece.
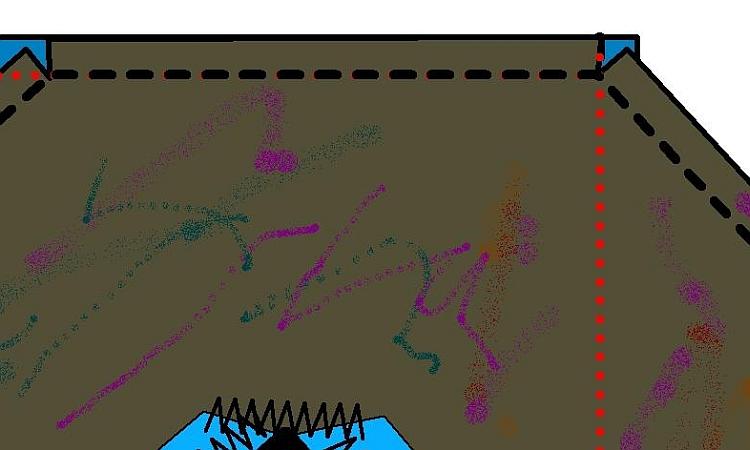
The dotted red line shows where the seam on the side piece is and is shown here for reference only
Now sew the two pieces together - I used a straight stitch along the reference seam with a zigzag stitch along the tab to provide more strength - note ONLY stitch along the Tab.
When you have completed that seam pull the top piece around so the next edge lines up with the top of the side piece:
Finally sew the ends of the Side piece together and trim to length - this should leave you with something looking like:


turn this inside out - and the cover is now completed!
Copyright © 2009 Australian Technical Production Services